A dental impression is a precise negative mould of your teeth and gum tissues — the exact “blueprint” your dental team uses to create custom-fit appliances and plan your care. According to the Cleveland Clinic, impressions are used for restorations, orthodontic appliances, and other custom devices. The most common uses include:
- Crowns and bridges
- Dentures and partial dentures
- Retainers and clear aligners
- Mouthguards and whitening trays
- Bite registrations to assess how your teeth come together
Table of Contents
- What a dental impression is and why your dentist needs one
- Dental impression types and materials explained
- How a traditional impression appointment works
- How digital impressions work and how they compare
- How to prepare for your impression appointment
- What happens after your impression is taken
- Why impression accuracy matters for your results
- What to expect at Healthysmiledentalhygiene in Orangeville
- Key takeaways
- Healthysmiledentalhygiene is your local resource for impressions in Orangeville
- Useful sources
- FAQ
What a dental impression is and why your dentist needs one
A dental impression captures the shape of your teeth and surrounding soft tissues in a negative imprint. That imprint is then filled with dental stone or processed digitally to produce a three-dimensional model, which the lab uses to fabricate your restoration or appliance. StatPearls on NCBI notes that dental casts made from impressions are used to analyse clinical cases, manufacture removable and fixed prostheses, and build occlusal splints and mouthguards.
Your dentist may need an impression for several reasons:
- Diagnostic study models: To assess your bite, spacing, or jaw relationship before treatment begins.
- Final restorations: To fabricate a crown, bridge, or veneer that fits your tooth precisely.
- Orthodontic appliances: To create retainers, clear aligners, or space maintainers for children.
- Protective devices: Custom mouthguards for sports or night grinding, and whitening trays.
- Bite registrations: To record how your upper and lower teeth meet, guiding occlusal adjustments.
For example, if you need a dental crown, your dentist takes an impression of the prepared tooth so the lab can mill or cast a crown that fits perfectly. Starting orthodontic treatment? Study models from impressions help map your tooth positions before aligners are designed.
Pro Tip: Tell your dental team about any existing crowns, bridges, or implants before the impression is taken. This helps them choose the right material and technique for your specific situation.
Dental impression types and materials explained
The three clinical types
Three main impression types are used in clinical practice:
- Preliminary impressions capture a general overview of your teeth and gums, typically used for study models, custom tray fabrication, or planning removable dentures.
- Final impressions are high-precision records used for permanent restorations like crowns, bridges, and implant components — accuracy here is critical.
- Bite registrations record the relationship between your upper and lower teeth, helping the lab set the correct occlusion in your appliance.
Materials your clinic may use
| Material | Primary use | Pros | Cons |
|---|---|---|---|
| Alginate | Preliminary impressions, study models | Affordable, easy to mix, comfortable | Less precise, must be poured quickly |
| Polyvinyl siloxane (PVS/VPS) | Final impressions, crowns, bridges | High detail, dimensionally stable | Firmer feel, higher cost |
| Polyether | Final impressions, implants | Excellent accuracy, rigid set | Stiffer to remove, moisture-sensitive |
| Dental stone/plaster | Pouring the cast from impression | Produces durable model | Physical storage required |
| Digital intraoral scan | Any impression type | No material in mouth, instant 3D file | Depends on clinic equipment |
Alginate is frequently used for preliminary impressions, while PVS and polyether offer the higher detail needed for final impressions. In short:
- Patients getting study models or denture planning typically receive alginate — it’s comfortable and cost-effective.
- Patients needing crowns, bridges, or implant restorations usually get PVS or polyether for maximum accuracy.
- Patients at clinics with intraoral scanners may skip tray materials entirely and have a digital scan instead.
How a traditional impression appointment works
Traditional impressions follow a clear sequence, and the whole process is much quicker than most patients expect.
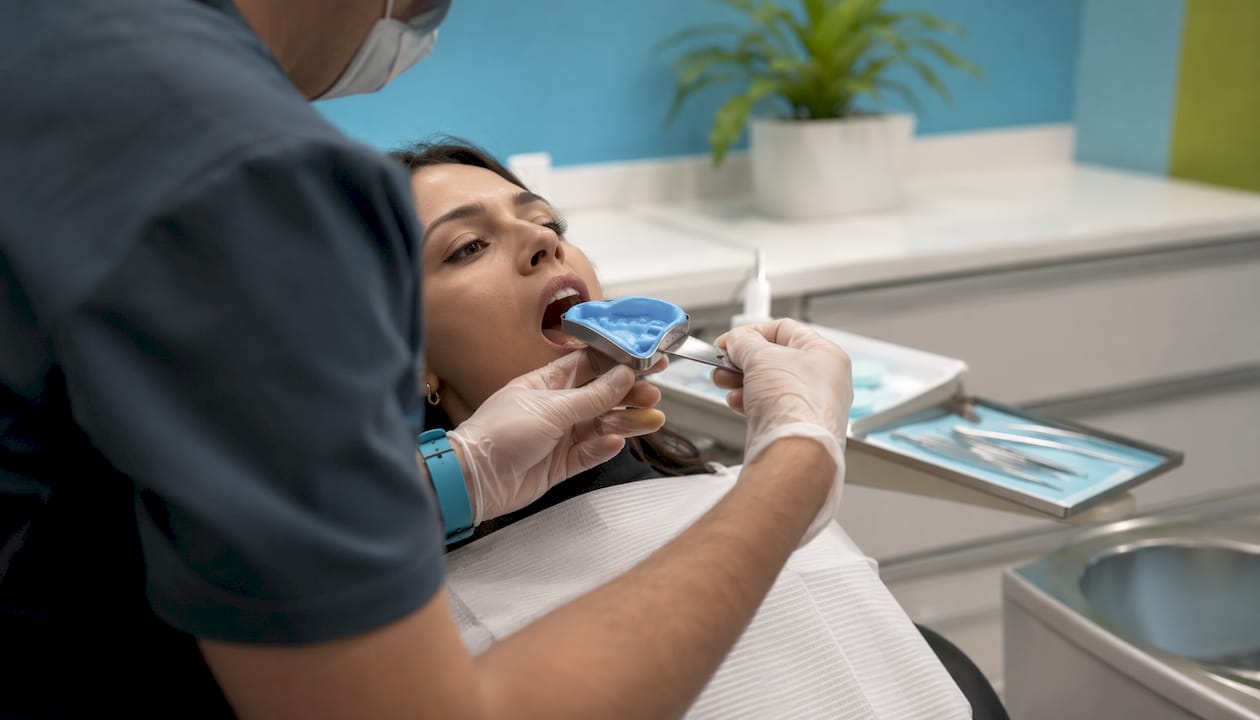
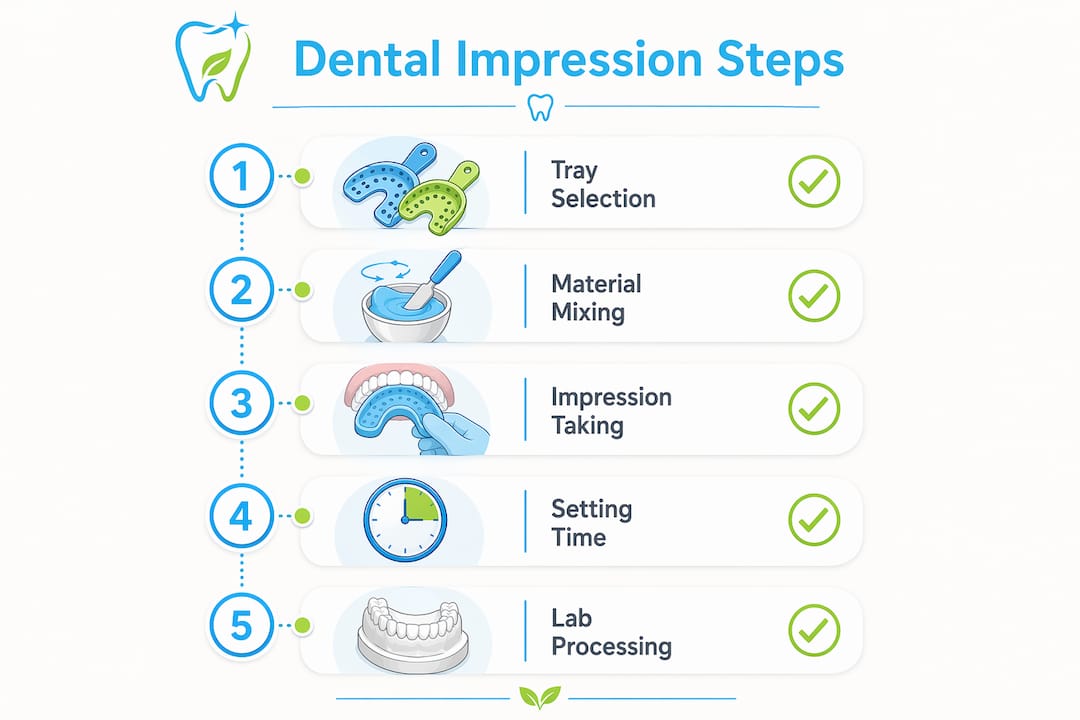
- Tray selection: Your clinician selects a tray that fits your arch size — upper, lower, or a partial section.
- Material preparation: Alginate or PVS is mixed to a smooth, even consistency and loaded into the tray.
- Tray placement: The tray is seated gently over your teeth and held in position with light pressure.
- Setting time: The material firms up while you breathe calmly through your nose. Alginate sets in a few minutes, with PVS taking slightly longer.
- Removal: Once set, the tray is removed with a quick, firm motion. The material releases cleanly from your teeth.
- Lab pouring: The impression is poured with dental stone to create a solid model, which is sent to the lab.
The in-mouth portion typically takes about 10–15 minutes, with the full impression appointment lasting roughly 20–30 minutes.
A common concern is whether the material will pull on existing crowns or restorations. Professionally formulated impression materials and careful removal technique mean impressions should not dislodge crowns or other restorations when performed correctly.
Pro Tip: If you have a strong gag reflex, let your team know before they load the tray. Breathing steadily through your nose, tilting your head slightly forward, and focusing on a fixed point on the ceiling can all help. Your clinician can also try a smaller tray or adjust the seating angle.
How digital impressions work and how they compare
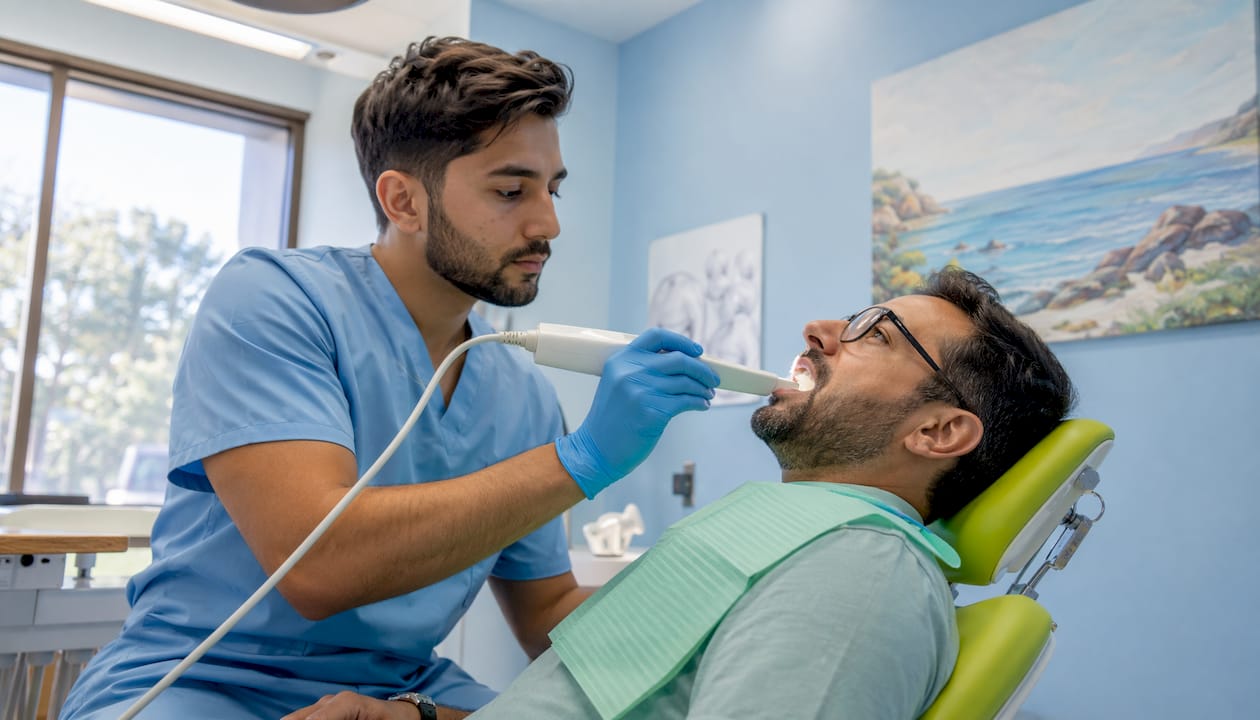
Digital impressions replace the tray and paste with a small handheld wand called an intraoral scanner. The scanner sweeps across your teeth, capturing thousands of images per second that the software stitches into a precise 3D model. That file is sent electronically to the lab or used directly in CAD/CAM workflows for same-day restorations.
Advantages of digital impressions:
- No impression material in your mouth — a real comfort benefit for patients with a gag reflex
- Faster workflow in many cases, with no waiting for material to set
- Digital files stored indefinitely, making remakes and future appliances easier to produce
- Immediate on-screen preview so you and your clinician can review the scan together
Considerations to keep in mind:
- Availability depends on clinic equipment and staff training
- Some complex cases or specific materials may still call for a traditional impression
- Operator skill matters — a well-taken traditional impression can be just as accurate
Digital impressions are increasingly preferred for patient comfort and precision in restorative and orthodontic workflows. Choosing between the two methods is a conversation worth having with your dental team. Modern intraoral scanning also feeds directly into CAD/CAM production, which can shorten the time between your appointment and receiving your finished restoration.
Pro Tip: Ask your clinic whether a digital scan is available for your procedure. If you’ve had difficulty with traditional impressions in the past, this is worth requesting specifically.
How to prepare for your impression appointment
A little preparation makes the appointment go more smoothly for everyone. Before you arrive:
- Let your dental team know about any medications you take, particularly blood thinners or medications that affect saliva.
- Bring your insurance information so coverage can be confirmed in advance.
- Eat a light meal beforehand — an empty stomach can heighten sensitivity, but avoid a heavy meal right before.
- If you have a strong gag reflex or dental anxiety, mention it when you book so the team can plan accordingly.
- Note any existing crowns, bridges, implants, or loose teeth to discuss with your clinician.
During the appointment, you’ll feel gentle pressure as the tray is seated and a brief sensation of fullness while the material sets. The taste of alginate is mild; PVS materials are generally flavourless. You can signal your clinician at any time if you need a pause — your comfort matters, and the team will work with you.
Pro Tip: You can ask specifically: “Do you offer digital scanning for this procedure?” or “Can we use a smaller tray?” These are reasonable requests, and a good dental team will be happy to discuss your options before starting.
If you’re new to the clinic, reading about what to expect at your first dental visit in Orangeville can help you feel more at ease.
What happens after your impression is taken
Once your impression leaves the clinic, the lab workflow begins. Physical impressions are poured with dental stone to create a solid cast; digital files are transmitted electronically and processed immediately.
| Step | Typical timeframe |
|---|---|
| Impression poured / digital file sent | Same day as appointment |
| Lab model created (physical cast) | Within a few days |
| Appliance or restoration fabricated | Several business days (varies by type) |
| Fitting appointment booked | After lab delivery |
Total turnaround from impression to receiving your appliance typically ranges from a short to moderate time frame, depending on the complexity of the restoration. Dentures and full-arch appliances generally take longer than a single crown.
Digital files can shorten lab turnaround and simplify remakes, since the lab can reprocess a digital scan without requiring a fresh physical impression. Physical casts are usually kept on file for a period determined by your clinic’s records policy.
- Physical casts require storage space and can be damaged over time.
- Digital files can be stored indefinitely and retrieved instantly for future work.
- If a remake is needed, a stored digital file means no second appointment for a new impression.
In many restorative workflows, the cost of the impression is bundled into the overall appliance or restoration fee rather than billed separately. Confirm with your clinic or insurer how impressions are itemised on your treatment plan.
Why impression accuracy matters for your results
The quality of your impression directly determines the quality of your restoration. An accurate impression produces an accurate lab model, which produces a better-fitting crown, bridge, or appliance with fewer adjustments after delivery.
When an impression is inaccurate, the consequences are practical and frustrating:
- A crown that doesn’t seat properly may require multiple adjustment appointments or a full remake.
- An ill-fitting denture can cause sore spots, difficulty chewing, and accelerated bone loss.
- A retainer made from a poor model may not hold tooth position effectively.
This is why your dental team takes care with tray selection, material mixing, and removal technique. Your cooperation during the appointment — staying still, breathing calmly, and not pressing your tongue into the tray — makes a real difference to the outcome.
Pro Tip: If your new crown or appliance feels off after delivery, ask your dentist directly: “Is an adjustment included, or would a remake be needed if the fit isn’t right?” Knowing the policy upfront reduces stress and sets clear expectations.
For patients considering crowns, understanding the pros and cons of dental crowns can help you prepare for the full treatment pathway, including the impression step.
What to expect at Healthysmiledentalhygiene in Orangeville
At Healthysmiledentalhygiene, impressions are part of a broader commitment to comfortable, accurate restorative care for families across Orangeville and Dufferin County. The team works with both traditional and digital impression methods, selecting the approach that best suits each patient’s needs and the specific procedure.
- Impression trays and materials are selected with patient comfort in mind, including options for patients with a sensitive gag reflex.
- All impression materials and trays are handled under strict sterilisation and infection control protocols.
- Impressions for crowns, bridges, retainers, mouthguards, and whitening trays are integrated into the full treatment workflow, with clear communication about lab timelines.
- The team is happy to discuss digital scanning availability for your specific procedure when you book.
Families in Orangeville appreciate the straightforward, no-pressure approach: your clinician will explain which type of impression is needed, why, and what to expect before anything is placed in your mouth.
Pro Tip: When booking your appointment, mention if you’ve had a difficult experience with impressions before. The Healthysmiledentalhygiene team can note this in your file and plan ahead to make the visit as comfortable as possible.
Key takeaways
A dental impression is a negative mould of your teeth and gums that serves as the precise blueprint for crowns, bridges, dentures, retainers, mouthguards, and orthodontic appliances.
| Point | Details |
|---|---|
| Definition | A dental impression is a negative mould used to create accurate models and custom appliances. |
| Two main methods | Traditional tray-and-material impressions and digital intraoral scans are both clinically valid options. |
| Appointment time | The in-mouth portion takes about 10–15 minutes; the full impression appointment is roughly 20–30 minutes. |
| Lab turnaround | Appliances typically arrive within one to three weeks depending on the type of restoration. |
| Healthysmiledentalhygiene | The Orangeville team offers both traditional and digital impression options as part of restorative and preventive care. |
Healthysmiledentalhygiene is your local resource for impressions in Orangeville
Healthysmiledentalhygiene offers crowns, bridges, retainers, mouthguards, Invisalign referrals, and custom whitening trays — all of which begin with an accurate impression. The Orangeville team takes a family-focused approach, explaining every step before it happens and accommodating patients who feel nervous or have had difficult experiences in the past.
Whether you’re coming in for a restorative procedure or exploring orthodontic options, the team can walk you through whether a traditional impression or a digital scan is the right fit for your treatment. Questions about coverage? The dental insurance guide on the Healthysmiledentalhygiene website explains how to maximise your benefits for family dental care in Ontario.
To book a visit or ask about digital impressions, contact the Healthysmiledentalhygiene team in Orangeville. A healthy smile really is a happy smile.
Useful sources
The following authoritative resources provide further reading on dental impressions, materials, and procedures. Clinical workflows and costs may vary locally; contact Healthysmiledentalhygiene in Orangeville for specifics that apply to your care.
- Dental Impression Materials — StatPearls / NCBI Bookshelf: Detailed clinical reference on impression material types, indications, and technique.
- Dental Impressions: Purpose and Procedure — Cleveland Clinic: Patient-friendly overview of why impressions are taken and what the procedure involves.
- Dental Impressions — DentalHealth.org: Covers both traditional and digital impression workflows and patient comfort considerations.
- Getting Dental Impressions? Here’s What to Expect — Colgate: Addresses common patient concerns including safety, comfort, and existing restorations.
- Step-by-Step Guide to Taking Dental Impressions — Unitek College: Practical walkthrough of the traditional impression procedure with timing guidance.
FAQ
Are dental impressions painful?
Dental impressions are generally not painful. Most patients feel mild pressure and brief fullness while the material sets, but discomfort is usually limited to pressure or taste, and your team can adjust the tray or technique if needed.
What are the three types of dental impressions?
The three clinical types are preliminary impressions (for study models and planning), final impressions (for precise restorations like crowns and bridges), and bite registrations (to record how your upper and lower teeth meet).
How long do dental impressions last?
Physical casts are typically stored according to your clinic’s records policy and can degrade over time. Digital impression files can be stored indefinitely and retrieved for future remakes or appliances without a new appointment.
Can dental impressions pull crowns out?
This is a common concern, but professionally formulated impression materials and careful removal technique mean impressions should not dislodge crowns or other restorations when performed correctly. Let your clinician know about any existing dental work beforehand.
What if I have a strong gag reflex?
A strong gag reflex can be managed with breathing techniques, a smaller tray, or a different seating angle. Asking about a digital intraoral scan is also a practical option, since it eliminates tray material entirely. Mention your gag reflex when booking so the Healthysmiledentalhygiene team can plan ahead.